A Small Photo Walk for a Grey Afternoon
A small photo walk on a grey afternoon turns reflections, textures and tonal contrasts into a coherent set of pictures, with the phone or camera you have.
You set out for a small photo walk on a grey afternoon, but the pictures on your screen look like a handful of unrelated pavement shots. The usual trouble is not a lack of colour or sunshine; it is that reflections, textures and tonal contrasts need a little attention before they become a coherent set.
An overcast walk can be treated as a short exercise in noticing how surfaces hold light. A shop window, a damp kerb, a pale wall and a dark coat may all belong together if you choose one simple idea to follow. Use the phone or camera already in your pocket, and let the walk’s limits give the pictures a shared character.
Choose a narrow route before the weather changes
A grey afternoon often feels visually open-ended: the light is even, colours can appear muted, and almost any street seems worth exploring. That freedom can make a walk diffuse. Choose a route with a clear beginning and end, such as a block of shopfronts, a path beside a row of trees or the way from a bus stop to a familiar square.
Give the walk one recurring subject. You might look for reflections that include a recognisable object, rough surfaces beside smooth ones, or dark shapes against pale backgrounds. The subject should be easy to spot without turning the outing into a search for a rare scene.
Decide what will make the pictures feel related. A consistent distance from the ground, a recurring vertical edge, or a preference for quiet frames with little visible sky can provide a thread. This is not a composition formula; it is a way to recognise when a scene belongs in the set.
Reflections disappear when the frame gets too busy
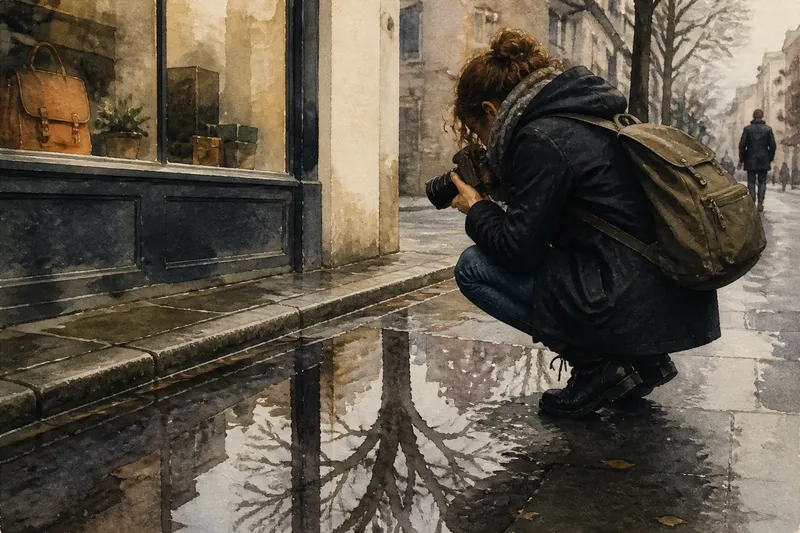
Shop windows and puddles can hold more than one scene at once. They may show a tree, a passing person, a sign and the street behind you, while the glass or water also reveals its own surface. When every layer competes, the reflection becomes a jumble rather than the subject.
Start by deciding which layer matters most. If the reflected tree is the point, shift until its shape sits against a simpler patch of glass or pavement. If the window display is more compelling, move so the street reflection becomes a subtle overlay rather than the main event.
Change your position before reaching for zoom. A step to the side can move a bright sign out of the reflected scene; lowering the camera can make a puddle carry more of the sky. On a phone, tap the area you want to hold detail in, then check whether the rest of the frame remains legible. On a camera, use the screen or viewfinder to assess the layers and adjust exposure if bright reflections dominate.
Say you find a puddle reflecting a bare tree beside a bright shop sign. If you shift until the tree branches cross a dark section of pavement and the sign leaves the frame, the expected result is a clearer reflection with fewer competing highlights. The puddle does not need to be large; its relationship with the surrounding surface gives the picture its structure.
Flat light makes texture hard to separate
Cloud cover softens shadows, which can make a brick wall, wet leaves or a knitted sleeve look flatter than they did in person. The texture has not vanished; its small changes in tone may simply be too subtle at the angle you chose.
Move along the surface rather than photographing it square-on. A shallow angle often makes mortar lines, grooves or droplets easier to read because the surface catches light unevenly. Look for a nearby edge where the material changes, such as brick meeting painted wood or rough stone beside smooth metal. That contrast gives the eye a reason to stay.
Keep an eye on the whole frame. A close view of bark may have excellent detail but no clear boundary, while a strip of pale wall beside it can give the texture room to register. Think of tonal contrast like the labels on two jars: a small difference is easier to recognise when the edges between them are clear.
If the phone offers exposure control, avoid brightening the entire scene just because the afternoon looks dim. A small adjustment may keep pale areas from washing out and preserve darker texture. With a camera, check the preview and highlights, then make a modest exposure correction if needed. The aim is not to force drama into soft light, but to retain distinctions you can see.
Muted colour can leave pictures without a common thread
When the sky is grey and the street is wet, colours may seem subdued. Trying to make every frame colourful can lead to unrelated pictures: a red sign, a blue coat and green railings do not automatically form a set just because each is vivid.
Instead, notice how colour sits beside tone. A small warm detail on a mostly grey wall can be enough; so can two shades of green separated by a dark railing. If a colour is not doing useful work, let texture or shape carry the frame. Monochrome conversion is another option, but it will not repair a busy composition or unclear subject.
To keep the set coherent, return to the recurring idea you chose at the start. If the walk is about reflections, include colour only when it helps a reflection read. If it is about rough and smooth surfaces, a bright object should earn its place by strengthening that contrast. This restraint makes the images feel considered without requiring the same subject in every frame.
A phone and a camera solve different small problems
A phone is quick to position close to the ground or near a window, and its screen makes it easy to compare the reflected scene with the objects behind you. A camera may offer a clearer view of fine texture and more direct control over exposure. Neither is necessary for this walk; choose the one that makes it easiest to pay attention.
Keep the equipment simple. Clean a smudged phone lens with a soft cloth, or check that the camera lens is clear before setting off. Use the screen or viewfinder rather than assuming the camera has captured what caught your eye. In reflections especially, a slight shift in framing can change the picture more than a complicated setting.
If your device offers grid lines, they can help you notice whether a wall edge or pavement seam is tilting. They are a checking aid, not an instruction to place every subject in the same position. Turn them off if they distract from the surfaces and layers you are trying to see.
When should you move closer to a reflection?
How do you keep a reflected scene from looking confusing?
Choose one recognisable shape in the reflection and simplify what surrounds it by changing your position. A dark branch against pale paving, for instance, may read more clearly than a full view containing signs, windows and passing traffic.
Should you photograph the puddle or what it reflects?
Decide whether the water’s outline or the reflected subject is carrying the picture. Include enough of the other element to explain the scene, but avoid giving both equal emphasis unless their relationship is the point.
What should you do when the texture looks flat?
Try a shallower angle and include an edge or neighbouring material for contrast. If the surface still reads as a blank patch, wait for a more useful arrangement rather than relying on extra sharpening.
Can you make a coherent set without matching colours?
Yes: repeat a subject, viewpoint or tonal relationship instead of a palette. A sequence of reflections with different colours can still belong together if each frame treats the layers in a similar, deliberate way.
Keep the walk small enough to edit afterwards
On the way back, pause at the route’s end and look through the pictures as a group. Remove frames that repeat the same observation without adding a new variation. A useful set might move from a broad reflection to a close surface detail, then return to a reflection with a different tonal balance.
Notice what is missing as well as what repeats. If every frame is a close-up, one wider view can show where the textures or reflections were found. If the sequence contains several bright highlights, a quieter image can give the eye a place to rest. The aim is not to document every corner, but to make a small set with a beginning, a change and a satisfying visual rhythm.
For your next small photo walk on a grey afternoon, keep the route familiar and the subject narrow, then let the light reveal what is already there. A single strong relationship—water against stone, glass against street, or rough material against a smooth edge—can hold the pictures together. Before leaving each scene, check that the subject is clear and that the frame contains no distraction you could remove with one easy step.